Category: Product Reviews
AC Dash Button Repair Kit Review (There’s only 1 ISSUE!)
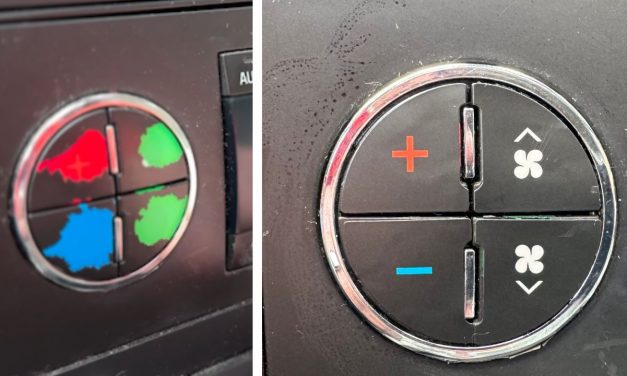
I bought my 2007 Chevy Tahoe LTZ a little over a year ago now, and one of the few things that I...
Read More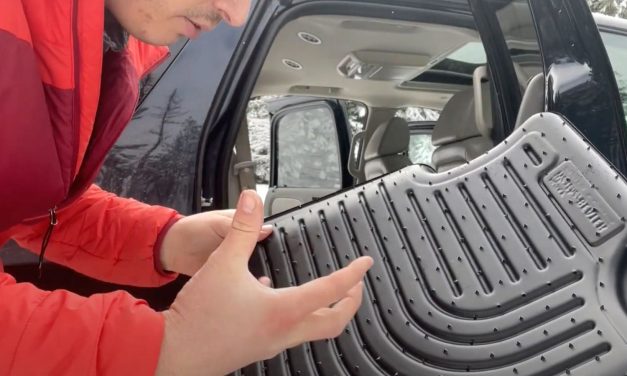
Husky Liners WeatherBeater Floor Liners & Cargo Liner Review
I recently purchased a 2007 Chevrolet Tahoe LTZ as a project for our Youtube channel and to test...
Read More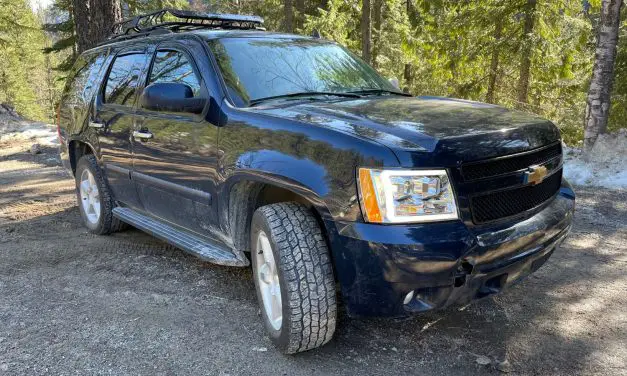
Anzo Switchback Projector Headlights Review: Finally Updating 2007 Tahoe
In 2006, Audi released the R8 to the world. While this was not only the beginning of one of my...
Read More